


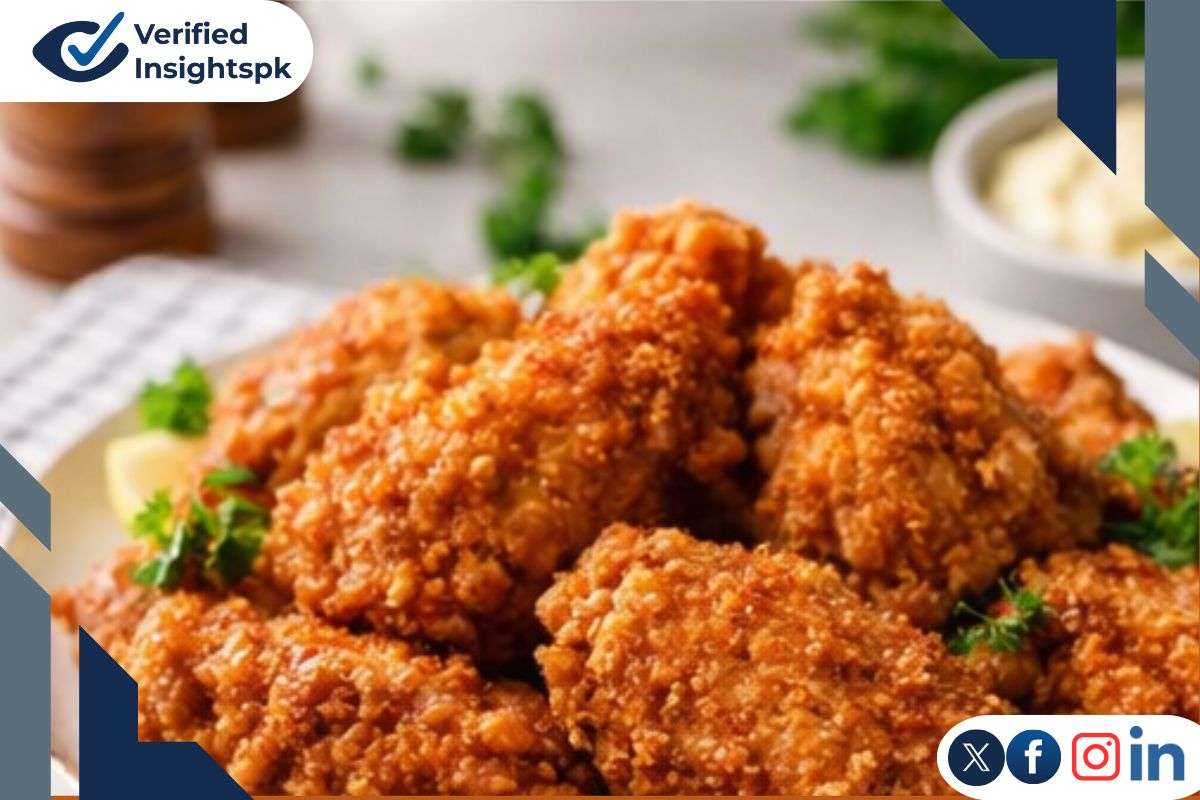
The Secret to Restaurant-Quality Crispy Gus Fried Chicken |My Kitchen Experiment Success Story|
0For months, I had been searching for the perfect Gus fried chicken recipe. You know the kind I am talking about, that incredibly crispy, crackling crust with juicy, tender meat inside. The type of fried chicken that makes your mouth water just thinking about it. After countless experiments in my kitchen, burning through kilos of chicken and testing different techniques, I finally cracked the code.
The game-changer? A technique I stumbled upon that completely transformed my fried chicken game. Instead of the traditional flour coating everyone uses, I discovered that using a cornstarch-based wet marinade creates an unbelievably crispy texture that stays crunchy even after sitting for a while.
Let me share exactly how I make what my family now calls “the best fried chicken they have ever tasted.”
What Makes Gus Fried Chicken Recipe Different?
The Cornstarch Secret
Most fried chicken recipes tell you to dredge chicken in seasoned flour. That is fine, but it does not create that shattering, glass-like crispiness I was after. Through my testing, I found that cornstarch creates a lighter, crunchier coating that actually gets MORE crispy as it cools slightly.
The 24-Hour Magic
Here is the part that requires patience but delivers incredible results: marinating the chicken in the wet cornstarch mixture for a full 24 hours. I know, that seems excessive. But trust me on this. During those 24 hours, three amazing things happened:
- The coating bonds to the chicken. When you fry it, the coating stays put instead of sliding off
- The meat becomes incredibly tender. The marinade breaks down the chicken fibres
- Flavours penetrate deep. Every bite is seasoned, not just the outside
I tested this both ways – with just 2 hours of marination versus 24 hours. The difference was night and day. The 24-hour version was tender, juicy, and had flavour all the way through.
Ingredients You Will Need for Gus Fried Chicken Recipe
1) For the Chicken:
- 1 kg boneless chicken (breasts or thighs – I prefer thighs for more flavour)
- Cut into medium-sized pieces (not too large or they won’t cook through)
2) For the Cornstarch Coating:
- 1 cup (250ml) cornstarch – The star ingredient
- 4 tablespoons all-purpose flour (about 60ml) – Adds structure
- 1 tablespoon black pepper (coarsely ground works best)
- 1 tablespoon sweet paprika (gives that beautiful colour)
- 1 tablespoon cayenne pepper (adjust based on your heat preference)
- 1 teaspoon salt (I use regular table salt)
- 1 cup (250ml) cold water – Or buttermilk if you have it
3) For Frying:
- Cooking oil – I use sunflower oil, but vegetable, canola, or peanut oil all work fine
- Enough to fill your pot about 3-4 inches deep
Optional Finishing Touch:
- Extra cayenne pepper or your favourite spicy seasoning for dusting
Step-by-Step: How I Make This Gus Cryspy Fried Chicken
Day 1: Prepare the Marinade (Takes 15 minutes)
Step 1: Mix Your Dry Ingredients
In a large mixing bowl, I combine all the dry ingredients first:
- Cornstarch
- Flour
- Black pepper
- Paprika
- Cayenne pepper
- Salt
I use a whisk to mix everything thoroughly. You want the spices evenly distributed throughout the mixture. Take a moment to smell it – it should smell amazing already!
Pro tip: When I first made this, I did not mix well enough and ended up with pockets of plain cornstarch. Mix for at least 30 seconds!
Step 2: Add Water to Create the Slurry
Here is where it gets interesting. Slowly pour in the water while whisking constantly. What you are creating is what I call a “thick slurry” – it should look like pancake batter.
The right consistency: When you lift your whisk, the mixture should fall back down in thick ribbons. Not too thin (like water) and not too thick (like paste). If it’s too thick, add water one tablespoon at a time. Too thin? Add a bit more cornstarch.
My mistake the first time: I made it too watery. The coating did not stick properly and slid right off during frying. Learn from my error!
Step 3: Add the Chicken
Cut your chicken into pieces if you have not already. I usually cut breasts into 3 pieces each – bite-sized but substantial enough to stay juicy.
Drop all the chicken pieces into the slurry. Using your hands (wear gloves if you prefer), make sure every single piece is completely coated. The mixture should cling to the chicken.
Step 4: The Waiting Game
Cover the bowl with plastic wrap or a lid. Refrigerate for 24 hours.
I know this feels like forever when you are excited to eat, but this is what separates good fried chicken from AMAZING fried chicken. Mark your calendar. Wait. You won’t regret it.
Important: During the 24 hours, the mixture might separate a bit with liquid on top. That’s completely normal. Just give it a stir before using.
Day 2: Frying Day! (The Exciting Part)
Step 5: Set Up Your Frying Station
Before you even turn on the stove, get organized. Trust me, once you start frying, things happen fast.
Here is what I set up:
- Heavy-bottomed pot or deep pan filled with 3-4 inches of oil
- Cooking thermometer (essential!)
- Slotted spoon or spider strainer
- Wire rack set over a baking sheet (for draining)
- Paper towels
- Small bowl of extra cayenne (optional, for finishing)
Step 6: Heat the Oil to the Magic Temperature
Pour oil into your pot and heat it over medium-high heat. You’re aiming for 325-350°F (165-175°C).
Why this temperature matters:
- Too hot (above 375°F): The outside burns before the inside cooks
- Too cold (below 300°F): The chicken absorbs oil and becomes greasy
I learned this the hard way. My first batch at 400°F looked beautiful on the outside but was still raw in the middle. Disaster!
No thermometer? Drop a tiny bit of batter into the oil. If it sizzles immediately and rises to the surface, you’re ready.
Step 7: Fry in Batches
Remove chicken pieces from the marinade. The coating should stick to them like a thick, gloppy layer. Don’t shake off the excess – you want all that coating!
Important: Don’t crowd the pot. I fry 3-4 pieces at a time. Here’s why:
- Too many pieces drop the oil temperature
- They stick together
- They don’t cook evenly
Gently lower each piece into the hot oil using a slotted spoon (don’t drop from height – oil will splatter!).
Step 8: Fry Until Golden and Crispy
This is where patience comes in. Fry for 10-15 minutes, depending on the size of your pieces.
What you’ll see:
- First 2 minutes: Lots of bubbling (that’s moisture escaping)
- After 5 minutes: Coating starts turning golden
- After 10 minutes: Beautiful reddish-brown color develops
How to know when it is done:
- The coating is deep golden-brown
- Bubbling has slowed down significantly
- Internal temperature is 165°F (75°C) if you have a meat thermometer
I flip my pieces halfway through (around the 7-minute mark) to ensure even browning.
My pro tip: If you’re unsure, slightly undercook in the oil, then finish in a preheated 300°F (150°C) oven for 10 minutes. This ensures the inside is cooked without burning the outside.
Step 9: Drain and Season
Using a slotted spoon, transfer the fried chicken to your wire rack. The rack is better than paper towels because it lets air circulate, keeping the bottom crispy.
Optional but recommended: While the chicken is still hot, lightly dust with extra cayenne pepper or your favorite spicy seasoning. The heat helps it stick.
Let it rest for 5 minutes before serving. This allows the juices to redistribute.
What I Learned Through Testing
My First Attempt: Learning Curve
My very first batch was… let’s say “educational.” I made several mistakes:
- I did not marinate long enough – Just 3 hours. Result? Good but not amazing
- Oil was too hot – Burned outside, raw inside
- I crowded the pan – Chicken pieces stuck together
But even with those mistakes, it was still pretty good! That’s when I knew this method had serious potential.
Perfecting the Recipe
Over the next few weeks, I tried different variations:
Temperature test: I fried batches at 300°F, 325°F, 350°F, and 375°F. The sweet spot was definitely 325-350°F.
Marination time: Tested 2 hours, 12 hours, 24 hours, and 48 hours. 24 hours was perfect. 48 hours made the coating slightly too soft.
Spice levels: My family prefers medium heat, so 1 tablespoon of cayenne is our standard. But I’ve made it with 2 tablespoons for guests who like it hot – they loved it!
Buttermilk vs. Water: I tried both. Buttermilk adds a slight tang and helps with tenderness, but water works perfectly fine and is more accessible. I usually use water.
Tips for Perfect Restaurant-Style Fried and Crispy Results Every Time
Before You Start:
Use a thermometer – Guessing oil temperature is the #1 cause of failure
Don’t skip the 24 hours – Seriously, it makes all the difference
Pat chicken dry before cutting – Excess moisture dilutes the marinade
Room temperature oil heats faster – Take it out of storage 30 minutes early
During Cooking:
Maintain steady heat – Adjust burner as needed to keep oil at 325-350°F
Do not flip constantly – Let each side cook undisturbed for 7-8 minutes
Listen to the sizzle – Vigorous bubbling = good; quiet = oil too cool
Work in batches – Better to fry 3 batches than ruin everything by crowding
After Frying:
Use a wire rack – Keeps the bottom crispy
Season while hot – Seasonings stick better
Serve within 30 minutes – That’s when it’s absolute perfection
Reheat in oven, not microwave – Microwave makes it soggy
Troubleshooting Common Problems
Problem: Coating Falls Off During Frying
Likely cause: Didn’t marinate long enough, or the mixture was too thin
Solution: Make sure you marinate for 24 hours, and the slurry has the right pancake-batter consistency
Problem: Chicken Burns onthe Outside, Raw Inside
Likely cause: Oil temperature too high
Solution: Lower the heat and maintain 325-350°F. Finish in the oven if needed
Problem: Greasy, Heavy Coating
Likely cause: Oil temperature too low or chicken not drained properly
Solution: Keep oil hot and use a wire rack for draining, not paper towels
Problem: Not Spicy Enough
Likely cause: Not enough cayenne or fresh spices
Solution: Increase cayenne to 2 tablespoons or add chopped fresh chillies to the marinade. Dust with extra cayenne after frying
Problem: Coating Not Crispy
Likely cause: Too much moisture in the coating orthe oil not hot enough
Solution: Check oil temperature and make sure coating isn’t too wet. Add more cornstarch if needed
Variations I Have Tried For Perfect Homemade Gus Fried Chicken
Extra Spicy Version Of Gus Fried Chicken (For Heat Lovers)
Add to the marinade:
- 2-3 chopped green chillies
- 1 teaspoon crushed red pepper flakes
- 1 extra tablespoon of cayenne
Result: Seriously spicy! My nephew loved it, but my sister needed three glasses of water.
Pakistani Masala Version of Gus Fried Chicken
Replace black pepper with:
- 1 tablespoon garam masala
- 1 teaspoon red chilli powder
- ½ teaspoon cumin
Result: Familiar Pakistani flavours with that amazing crispy texture
Garlic Lover’s Version of Gus Fried Chicken
Add to marinade:
- 2 tablespoons garlic powder
- 1 tablespoon onion powder
Result: Delicious, but the garlic powder can add a slight bitter aftertaste if you fry for too long. Keep temperature controlled.
Buttermilk Tender Version of Gus Fried Chicken
Replace water with:
- 1 cup cultured buttermilk
Result: Extra tender with a subtle tangy flavour. Great if you can find buttermilk in Pakistan.
Serving Suggestions
What I Serve It With:
Classic Sides:
- Fresh coleslaw (the crunch complements the crispy chicken)
- Buttered dinner rolls or fresh naan
- Pickled vegetables (cuts through the richness)
- French fries or potato wedges
Sauces:
- Spicy mayo (mix mayo with hot sauce and a squeeze of lemon)
- Garlic sauce
- Sweet chilli sauce
- Plain ketchup (sometimes simple is best)
Pakistani Style:
- Fresh salad with mint chutney
- Raita (yogurt with cucumber)
- Paratha or roti
- Sliced onions with lemon wedges
Complete Meal Ideas:
American Style: Fried chicken + coleslaw + biscuits + sweet iced tea
Pakistani Family Meal: Fried chicken + biryani rice + raita + fresh salad + cold drinks
Party Platter: Fried chicken pieces + 3 dipping sauces + fries + dinner rolls
Storage and Reheating Of Left Over Chicken
Storing Leftover Chicken
Refrigerator: Store in an airtight container for up to 3 days
My tip: Don’t stack pieces directly on top of each other. Place parchment paper between layers to prevent sticking.
The Right Way to Reheat
Oven method (BEST):
- Preheat oven to 375°F (190°C)
- Place chicken on a wire rack over a baking sheet
- Heat for 10-15 minutes until crispy and hot
Why this works: The wire rack allows heat to circulate, re-crisping the coating
Air fryer method (GOOD): 375°F for 5-7 minutes. Watch carefully!
Microwave (AVOID): Makes coating soggy and rubbery. Only use if you have no other option.
Frequently Asked Questions (From My Experience)
Can I use chicken with bones?
Yes! Bone-in pieces work great. Increase frying time to 15-20 minutes and check the internal temperature reaches 165°F. The bone actually adds flavour.
Can I make this with chicken wings?
Absolutely! Wings are perfect for this recipe. Fry for about 12-15 minutes. They’re my go-to for parties.
Do I have to use cornstarch? Can I use only flour?
You can, but you won’t get that signature crackly crispiness. Cornstarch is the secret ingredient here. It’s available at most supermarkets in Pakistan.
Can I prepare this without the 24-hour wait?
Technically, yes, but I strongly discourage it. I’ve tested shorter times, and the difference is significant. If you’re really short on time, minimum 12 hours – but 24 is better.
My coating is too thick/thin. What do I do?
Too thick: Add water, 1 tablespoon at a time, whisking well
Too thin: Add cornstarch, 1 tablespoon at a time, whisking well
It should coat the chicken like thick cream.
Is this recipe suitable for kids?
Yes! Just reduce the cayenne pepper to 1 teaspoon (or omit entirely) for a mild version. My nieces and nephews love it.
Can I freeze the marinated chicken?
I haven’t tested this personally, but in theory, yes. Freeze for up to 1 month. Thaw completely in the fridge before frying.
What oil is best?
I use sunflower oil (easily available in Pakistan). Vegetable oil, canola, or peanut oil all work. Avoid olive oil – it has a low smoke point.
Cost Breakdown According to Pakistan
Based on current market prices in Pakistan:
Ingredients:
- 1 kg chicken: Rs. 600-700
- Cornstarch (1 cup): Rs. 50
- Flour (4 tbsp): Rs. 10
- Spices (total): Rs. 100
- Oil (reusable): Rs. 200
Total cost: Approximately Rs. 960-1,060
Servings: 4-6 people
Per person cost: Rs. 160-265
Compared toa restaurant: Restaurant fried chicken in Pakistan costs Rs. 400-800 per person. You are saving money AND getting better quality!
My Final Thoughts
After making this recipe dozens of times (my family might be tired of being my taste testers!), I can confidently say this is THE fried chicken recipe I will use forever.
The crispy coating, the juicy meat, the way the spices penetrate all the way through it is restaurant-quality food made in your own kitchen. Yes, the 24-hour wait requires planning ahead, but it’s completely worth it.
The first time I served this to guests, they were silent for the first few minutes, just eating and making happy sounds. Then the compliments started flowing. “What restaurant did you order this from?” “This is better than KFC!” “You need to sell this!”
That is when I knew I had created something special. If you like it, please share this recipe with your friends and family.
Now Your Turn to Try!
Disclaimer: This article provides general cooking guidance for informational purposes. Food safety practices may vary. Always ensure chicken reaches an internal temperature of 165°F (75°C) for safe consumption. Cooking oil should be handled carefully to prevent burns or fire hazards. Check all ingredients for potential allergens. Results may vary based on individual cooking equipment and techniques.
Recipe Inspiration: This recipe is based on my research into Southern-style fried chicken techniques and extensive testing in my own kitchen. I have adapted these methods to work with ingredients easily available in Pakistan and adjusted seasonings based on my family’s preferences.
Published on Verified Insights Pakistan
© 2026 VerifiedInsightsPK.com